The basic split squat is a variation of the basic squat that uses a single leg. That’s why they are sometimes known as single leg squats, and they are great for making your squats more beneficial.
The split squat is often done as a powerlifting technique, combining the squat movement with some weights, like a dumbbell or barbell. It does not have to include the weight component, though.
There are a number of ways to do split squats, and we want to focus on one particular variation in this article- the rear foot elevated split squat.
If you are doing this exercise with weights, the risk of injury is higher, so make sure you get your form down properly and you are doing the exercise in the way it should be done.
You should definitely practice the single leg squat motions before adding any weight, just to minimize your risk of injury.
What Is a Rear Foot Elevated Split Squat
A split squat forces you to adopt an asymmetrical stance and place one foot forward and the other foot behind. The rear foot elevated split squat raises the back foot, placing further weight on the front foot.
The advantage is that the front foot then has to do more work. You need to exert harder and therefore burn more calories.
It’s a great way to get more out of an exercise without having to switch over to an entirely different exercise. This is also a powerful way to put more of your body into the workout and experience greater gains. It lets you focus on a single leg in a way that helps with uneven muscle building issues.
How to Do Rear Foot Elevated Split Squat
The key to making this exercise work for you and to incorporate it into your workout is to find a comfortable way to elevate that rear foot. Most athletes will use a bench, but you can use a box, a crate, or anything else that will support the weight of your rear foot.
You want to elevate it to a height that is about six inches off the ground. You can elevate it higher than that, but you need to choose a height that is comfortable for you.
It may be tempting to just use whatever is handy and work with that, but you can injure yourself if you are straining your rear foot too much by elevating it too high or elevating it in a way that isn’t comfortable. Your own height will help determine the height the foot support should be as well.
Taller people will need to elevate their feet further from the floor for maximum benefits.
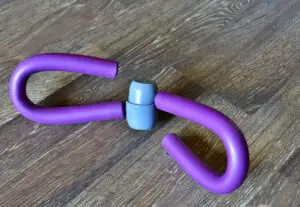
You can do this exercise with a split squat roller, which can be a standalone piece of equipment or an attachment to a larger rack. You can also use a bench and adjust the size to your height or elevate your front foot to get the right stance for this exercise.
The key is to put the weight and the exertion on that front leg, making it do the work of pushing your body up.
Your starting position should be in a stride position, or a lunge position. Your back foot should be elevated and resting on a hard surface, like a box or bench.
From there, bend your front knee and descend into a lunge. Keep going down until your thigh is in a line that is parallel to the floor. The toes of your front leg should be further forward than your front knee, if you are doing the lunge correctly.
Make your knee and hip extend to push yourself back to the starting position. That’s one rear foot elevated split squat, and you can repeat as needed for your reps. Then, switch over to the other leg.
The position of your arms during this exercise will depend on what kind of split you are doing. They can hang down past your side or you can hold a barbell or dumbbell in your hands. We will show you how to do this exercise with weights next.
What Is a Barbell Rear Foot Elevated Split Squat?
If you are using a barbell with this exercise, then you should use one that has no weight on it. You will be placing the barbell behind your head, and a weighted barbell could easily slip and damage your neck in this position. So, you should leave the weight off.
You can do the rear foot elevated split squat as normal with the rest of your body as we showed you above, but when adding a barbell to the maneuver, you want to make sure your hands are in the right position.
Hold the barbell behind your head, pressed against the top back of your shoulders. Your palms should be facing forward while grasping the bar, and your hands should be at about an even level with your neck. Keep the barbell in that position during all of your reps, giving yourself a rest as needed.
What Muscles Are Used in a Rear Foot Elevated Split Squat?
As we mentioned, this version of the squat is designed to focus on your front leg. It can really cause some intense burning in the muscles there, activating your quads, hamstrings, calves, and adductors.
These are great exercises for building leg strength, but be sure that you alternate legs after each set so that there is not a muscle imbalance.
By elevating the rear foot, you are not really using more muscles, but you are increasing the force requirements for your muscles, asking more of them so that you see greater gains.
This is a good mobility and agility exercise, as it helps to keep you limber and works on stretching the muscles and improving your range of motion. You may find it challenging at first, but that is kind of the point. After a while, it won’t be so strenuous.
It works your core as well, especially if you add the barbell or some dumbbells to the workout for extra gains. Your main focus with this exercise is definitely the lower and upper legs, but the entire body can benefit.
Tips for Maximizing Gains with the Rear Elevated Split Squat
This exercise can give you powerful gains in a short amount of time, but be careful about overdoing it. If you go too hard too quickly, you will wear yourself out prematurely and not be able to finish your reps or the rest of your workout.
Make sure your rear foot is able to stay in place without feeling too strained or uncomfortable. It should not be slipping as you do the exercise, and you should watch out that you don’t put undue pressure on the rear ankle.
If you cannot get a comfortable position, try stepping closer to the foot support or further away from it.
You can get more from the split by going further down into it. Try this until you start to feel the burning in your leg muscle, but be careful about coming back out of the dip too quickly.
Adding weight can be a great way to make the exercise more effective, but only do what you can handle. Start with smaller weights and work your way up, and be careful about the added weight throwing you off balance.
My name is Ellis Francis and I have been a personal fitness trainer, sports nutritionalist and health and fitness advisor for over 25 years. I am the lead health and fitness advisor at https://awellnessbody.com.