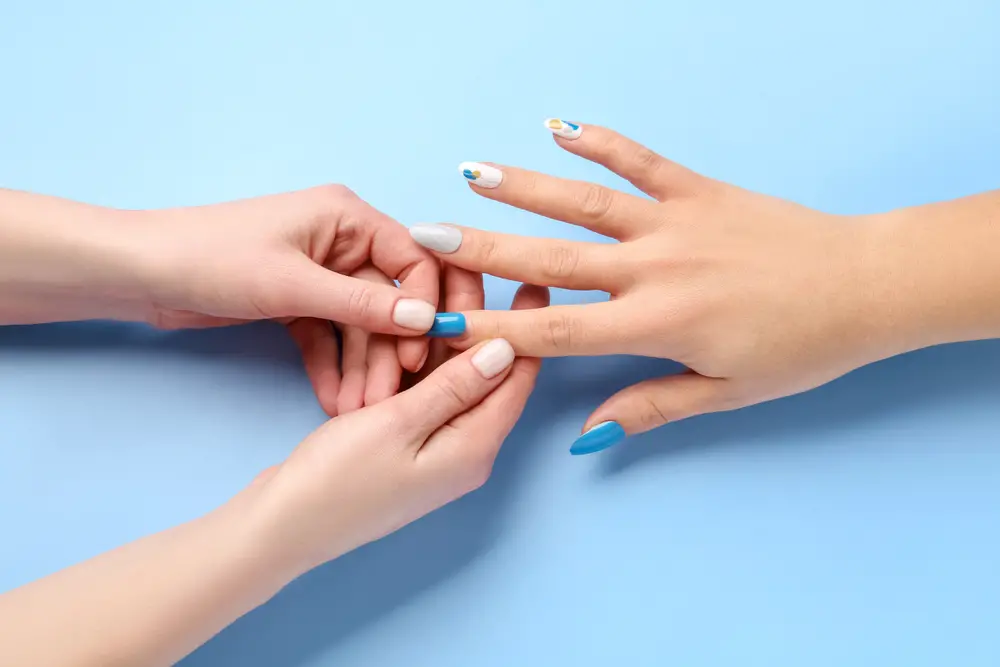
Press-on nails have become increasingly popular over recent years, thanks to their convenience and the ability to showcase one’s personal style. With a variety of shapes and designs available, these temporary nail enhancements offer a sophisticated and manicured look without the need for a visit to a celebrity nail artist. From stunning and polished everyday nails to bold statement designs, press-on nails provide an affordable and time-saving option for individuals seeking to keep their fingertips looking fabulous.
Applying press-on nails takes only a few minutes, allowing for a quick and hassle-free transformation. However, the removal process is critical to ensure that natural nails remain healthy and undamaged. Thus, learning how to remove press-on nails correctly is essential for maintaining strong and beautiful nails.
In this article, we will discuss the best methods for removing press-on nails and offer expert tips for preventing damage to the natural nails. By following the recommended techniques, you can enjoy the convenience and style of press-on nails while maintaining healthy nail growth.
The Benefits of Using Press-On Nails
Press-on nails have become a popular choice among beauty enthusiasts, and for good reason. They provide a customizable and convenient option for those who want to achieve salon-worthy nails without the cost or commitment. In this section, we will discuss some of the many benefits of using press-on nails.
Firstly, press-on nails are highly customizable. With a vast array of designs, nail art, and nail shapes available, one can easily find a style that suits their preferences and mood. This allows for endless possibilities and the opportunity to experiment with different looks without spending a fortune at the salon.
Another significant advantage of press-on nails is that they are reusable. This means that after removing them carefully, you can store the nails and apply them again at a later time. Not only does this save money, but it also reduces the amount of waste generated by single-use nail extensions.
Press-on nails are also known for their durability. When applied correctly using a strong adhesive, they can last up to two weeks. This long-lasting effect ensures that your nails not only look great but also withstand daily activities without chipping or breaking.
Moreover, press-on nails come in various nail kits, catering to individual needs and providing all the necessary tools for application. This includes pre-sized nails, adhesive, and sometimes even a top coat for added longevity and shine. These kits make it easy to achieve professional-looking results at home, even for beginners.
In conclusion, press-on nails offer numerous benefits, such as being highly customizable, reusable, durable, and accessible. They allow users to experiment with different nail art and shapes without breaking the bank. With easy-to-use nail kits available, achieving salon-worthy nails at home has never been more accessible. So, whether you’re a nail art aficionado or looking for a convenient alternative to traditional nail extensions, press-on nails are an excellent option to consider.
Preparations for Removal
Before attempting to remove press-on nails, it is essential to gather all the necessary tools and follow a few preparatory steps. First, gather a hand moisturiser, cuticle oil, nail clippers, a nail file, a nail buffer, an orangewood stick, cuticle nippers, a metal pusher, and nail strengthener. These items will aid in the removal process and help to maintain the health of your natural nails.
Prior to starting the removal process, apply cuticle oil to the base of each nail. This will help to soften the skin and make it easier to work with the cuticle area. Use the metal pusher to gently push back the cuticles, taking care not to apply too much pressure and cause damage to the nail bed. Follow up with cuticle nippers to trim any excess skin.
Next, trim the press-on nails using nail clippers to a manageable length. This will make the soaking process more efficient and less time-consuming. File the free edge with a nail file to smooth out any rough edges.
In order to allow the nails to soak more effectively, create some space between the press-on nail and the natural nail. Using an orangewood stick, gently lift the edge of the press-on nail, making sure not to force it and cause damage to the natural nail beneath.
After you have completed all preparations, your nails are now ready for removal. Remember to moisturise your hands thoroughly at the end of the process with a hand moisturiser, as well as using a nail strengthener to promote healthy nail growth. It is recommended to wait for at least two weeks before reapplying press-on nails in order to give your natural nails time to recover and regain strength.
Step-by-Step Guide to Removing Press-on Nails
In this section, we will discuss the process of removing press-on nails at home using two different methods: adhesive tabs and nail glue. Both methods are effective for proper removal, but the choice of method depends on your preferences and the type of press-ons you have used.
Using Adhesive Tabs
Adhesive tabs, also known as sticky tabs, are a popular alternative to nail glue when applying press-on nails. This method of removal is considered easier and less damaging to your natural nails.
- Start by gently lifting the edges of the press-on nails using an orangewood stick or a cuticle pusher. Be cautious not to force the nail off, as this may cause damage to the natural nail underneath.
- Once the edge is slightly lifted, apply a few drops of cuticle oil underneath the press-on nail to help loosen the adhesive tab further.
- Allow the oil to soak in for a few minutes before gently sliding the orangewood stick or cuticle pusher under the press-on nail, working your way around the edges.
- Continue to gently lift the press-on nail until it comes off entirely. If you encounter resistance, apply more cuticle oil and let it soak for a few more minutes before attempting to remove the nail again.
- After all press-on nails are removed, clean the adhesive residue from your natural nails using a cotton pad soaked in nail polish remover or acetone.
Using Nail Glue
When using nail glue to apply press-on nails, the removal process requires a bit more caution to avoid damaging the natural nails.
- Begin by filing down the top layer of the press-on nails to expose the glue underneath. This will allow the acetone to penetrate more effectively.
- Soak a cotton ball or pad in acetone and place it on top of the press-on nail. Wrap each nail, along with the acetone-soaked cotton, in aluminium foil to keep it in place and allow the acetone to work its magic.
- Allow the nails to soak for at least 10-15 minutes. This will help soften the glue, making the removal process easier.
- Unwrap each foil one at a time, and gently press down on the nail using an orangewood stick or cuticle pusher to slide the press-on nail off. If the nail is not coming off easily, re-wrap it with a soaked cotton ball or pad and foil, letting it soak for another few minutes.
- Once all press-on nails are removed, clean any remaining glue residue from your natural nails using a cotton pad soaked in acetone or nail polish remover. Afterwards, wash your hands thoroughly to remove any remaining acetone residue.
By following these steps and using the appropriate method, you can confidently and safely remove press-on nails at home without causing damage to your natural nails.
Post-Removal Care
After successfully removing press-on nails, it is essential to take care of your natural nails and nail beds to maintain their health and strength. Start by cleaning your nails to remove any residual glue or adhesive. Gently peel off any leftover adhesive with a wooden cuticle stick or cotton pad, being mindful not to cause any damage to your natural nails.
Next, you can wash your hands and nails with warm soapy water, using a gentle liquid hand soap to remove any remaining adhesive, oils, or residue from the nail polish remover. If acetone-based nail polish remover was used during the removal process, it could potentially dry out the nail beds. Therefore, it is recommended to rinse your nails with rubbing alcohol to neutralise the effects of the remover and cleanse the surface further.
Hydration is crucial for the health of both your nails and nail beds. To replenish lost moisture, massage a few drops of natural oil, such as jojoba oil or almond oil, onto your nails and cuticles. This will help to restore any depleted hydration, nourish your nails, and promote healthy nail growth.
Finally, avoid reapplying press-on nails or nail polish immediately after removal. Give your natural nails some time to recover and breathe. You may want to apply a nail strengthener or a clear, nourishing base coat to protect and strengthen your nails until your next manicure.
Pros and Cons of Reusing Press-ons
Press-on nails have become a popular alternative to traditional salon services, such as gel extensions and acrylic nails. They offer a convenient and affordable way to achieve a polished nail look without the need for professional application. However, reusing press-on nails may have its own set of advantages and disadvantages.
One significant benefit of reusing press-on nails is the cost-effectiveness. Unlike temporary tips, which are typically single-use, or gel extensions and acrylics that require salon visits for removal and reapplication, press-on nails can be removed and reapplied multiple times. This can save both time and money for those looking for a quick and easy nail solution.
Another advantage of reusing press-on nails is the reduced risk of damage to the natural nail. Temporary tips, gel extensions, and acrylic nails often involve harsh chemicals and filing, which can weaken the natural nail and lead to breakage. Press-on nails, on the other hand, are applied with adhesive that can be removed gently with minimal impact on the natural nail.
Despite these benefits, there are also some downsides to reusing press-on nails. Firstly, the adhesive used for press-on nails may lose its effectiveness over time, leading to a weaker bond between the fake nail and the natural nail. This can result in the press-on nail detaching more easily or shifting during wear.
Additionally, reusing press-on nails may not provide the same longevity and durability as salon-applied nail techniques. While gel extensions and acrylic nails can last for weeks, press-on nails may need more frequent reapplication, especially if the adhesive weakens from reuse.
Lastly, reusing press-on nails may limit the options for new nail art or designs. Since the press-on nail is already shaped and painted, updating the look would require either painting over the existing design or attempting to reshape the nail, risking damage to the press-on.
In conclusion, reusing press-on nails offers several advantages, including cost-effectiveness and reduced risk of natural nail damage. However, there are also some disadvantages, such as weakened adhesive, shorter wear time, and limited options for new designs. Ultimately, the decision to reuse press-on nails depends on individual preferences and priorities.
Expert Advice on Press-On Nails
Press-on nails are a great alternative to traditional salon visits for those who want to achieve a professional look at home. To help you with the process of removing press-on nails safely and with minimal damage, we’ve gathered some expert advice.
start by soaking your nails in a bowl of warm water with dish soap and olive oil for 10 to 15 minutes. The warm water and dish soap will help soften the glue, while the olive oil works to moisturise and protect the natural nail underneath.
Another method recommended by professionals is soaking the nails in an acetone-based nail polish remover. This will break down the glue and help the press-on nails become loose enough to pull off without causing damage. To make this process gentler on your nails, you can mix a little baby oil with the nail polish remover.
When removing the press-on nails, avoid forcefully peeling or ripping them off as this can cause damage to the natural nail. Instead, gently lift the edges of the press-on using a cuticle pusher or the edge of a nail file. Then, carefully slide the tool under the nail and ease it off. It’s important to note that one should not use their regular cuticle nippers for this process, as the plastic from the press-on nails can cause damage to the blade.
Once the press-on nails are removed, it’s a good idea to give your natural nails some TLC. Gently buff the surface of your nails to remove any residual glue and smooth out any rough spots. Follow up with a nourishing cuticle oil and hydrating hand cream to help replenish moisture and improve the overall health of your nails.
By following these expert tips, you can easily and safely remove your press-on nails without causing damage to your natural nails. Take your time and pay attention to your nails’ needs to ensure a smooth and damage-free removal process.

I’m Jennifer a beauty and wellness expert. I believe in promoting a sustainable and healthy lifestyle from within. Helping people feel good is my passion; whether it’s teaching yoga or offering skincare advice.

