Polygel nails have gained immense popularity in the world of nail enhancements. Known for their durability, versatility, and ease of application, they offer an excellent alternative to traditional acrylic and gel nails. However, just as with other types of nail enhancements, it’s crucial to know how to remove them safely and effectively to prevent damage to your natural nails and the surrounding skin.
The removal process for polygel nails is similar to that of gel nails, requiring the gentle soaking-off method. This approach ensures that you avoid causing unnecessary harm by peeling or ripping off the nails. In this article, we’ll discuss the various ways to remove polygel nails at home, whilst ensuring the health and integrity of your natural nails.
By understanding the proper techniques and utilising the right tools, you can master the art of polygel removal with minimal fuss. So, let’s dive into the different methods you can try and find the one that best suits your needs and preferences.
Understanding Polygel Nails
Polygel nails are a popular and innovative nail enhancement technique that provide a strong, lightweight, and long-lasting alternative to traditional acrylic or gel nails. They are a hybrid between gel and acrylic, offering the best of both worlds in terms of flexibility, durability, and ease of application.
This unique nail system combines the strength of acrylics without the harsh chemicals and the flexibility of gel nails without the sticky residue, resulting in a more comfortable and natural-looking nail enhancement.
The application process for Polygel nails involves either squeezing the gel into a full tip that’s flexible, spreading the product thinly into the tip, pressing it onto the natural nail, and curing it under a gel lamp, or applying the product directly onto the nail and brushing the gel down to the preferred shape and length on top of a form.
One of the key advantages of Polygel nails is that they are odourless and produce very little dust during the application process, making it a more pleasant experience for both the nail technician and the client. Furthermore, Polygel nails can be easily sculpted and shaped, allowing for greater creative expression when it comes to nail designs.
In comparison to acrylics, Polygel nails are lighter and more flexible, which means they are less prone to lifting and breakage. Additionally, they offer a long-lasting alternative to traditional gel manicures, with many clients reporting that their Polygel nails last for several weeks without needing touch-ups or fill-ins.
Though Polygel nails boast several benefits, it is essential to understand the proper removal process to avoid damaging the natural nail. Remember that using the correct tools and techniques is crucial when removing Polygel nails to maintain the health of your nails.
In summary, understanding Polygel nails is crucial for anyone interested in exploring this versatile and innovative nail enhancement option. With their numerous benefits, it’s no wonder that Polygel nails continue to grow in popularity within the nail industry.
Signs That It’s Time to Remove Polygel Nails
There are several signs that it may be time to remove your polygel nails, either to take a break from enhancements or to switch to a new set. In this section, you will learn about the common signs indicating that it’s time for a polygel nail removal:
Firstly, lifting and peeling of the polygel from your natural nails can be a clear indication that removal is necessary. If you notice the edges lifting or the material starting to peel off, it’s best to remove them before they cause any damage to your natural nails.
Secondly, extended wear is another important factor to consider. Polygel nails can last for several weeks or even a month, but it’s essential to remove them after this period to give your natural nails a chance to breathe and restore their health. Wearing polygel nails for an extended period may lead to weakened or damaged nails.
Thirdly, if you experience itching, redness, or swelling around your nails, this may be a sign of an allergic reaction or a potential nail infection. In such cases, it’s crucial to remove the polygel nails immediately and consult with a professional to determine the cause of the issue.
Lastly, if you simply desire a change in your nail style or colour, removing your current polygel nails is necessary to make way for a new set. Whether you’re switching from polygel to another type of nail enhancement, or you just want to try out a new design, timely removal ensures a smooth transition.
Remember to carefully remove your polygel nails following the proper procedure, either through acetone soaking or other safe methods, to prevent damage to your natural nails and maintain their overall health.
Gathering Necessary Supplies
Before you begin the process of removing your polygel nails, it’s essential to gather all the necessary supplies to ensure a safe and efficient removal. In this section, we’ll discuss the tools you’ll need for removal and the protective gear you should have on hand.
Tools for Removal
For an effective polygel nail removal, you need the following tools:
- Nail file or E-file: This is essential for filing down the top layer of the polygel to allow acetone to penetrate the material easily. You can use a regular hand file or an electric file for this purpose.
- 100% Acetone: Pure acetone is the most effective solvent for dissolving polygel nails. It is crucial to use 100% acetone to speed up the removal process.
- Cotton pads or cotton balls: You will need these to soak in acetone and wrap around your nails during the soaking process.
- Aluminium foil or nail clips: These items will secure the acetone-soaked cotton pads or balls around your nails. You can use standard aluminium foil or purchase specialist nail clips.
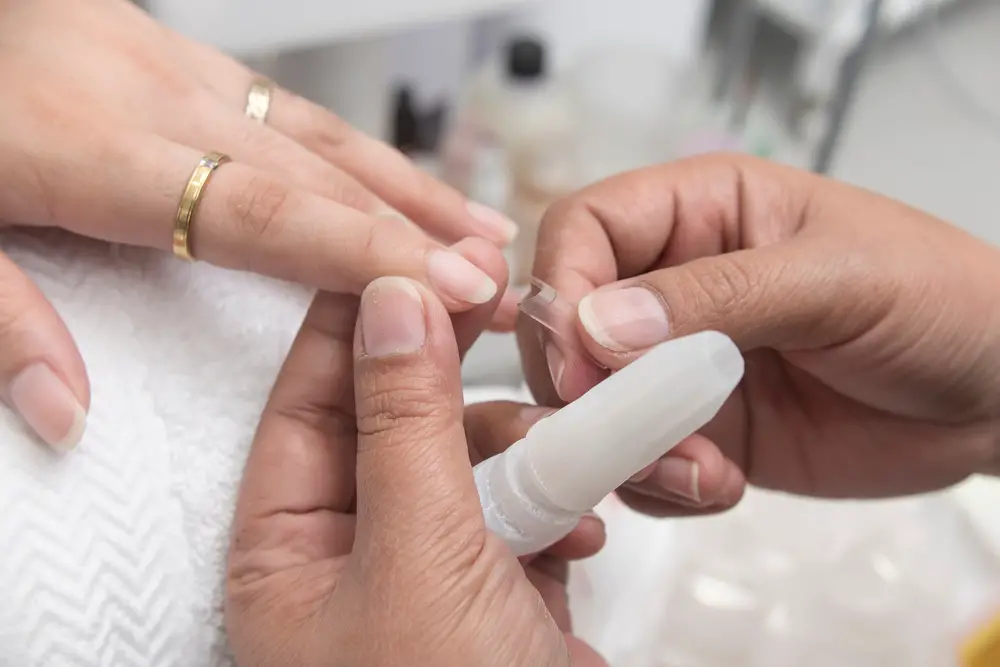
- Orangewood stick or cuticle pusher: Once the polygel has softened, a cuticle pusher or orangewood stick will help you gently remove the remaining material from your nails.
Protective Gear
Safety is paramount when working with chemicals like acetone. To protect your skin, eyes, and respiratory system, consider using the following protective gear:
- Gloves: Nitrile or vinyl gloves will protect your hands from the drying effects of acetone and prevent potential irritation.
- Safety glasses: They protect your eyes from accidental splashes of acetone, which can cause severe irritation.
- Mask: While not essential, wearing a mask will minimise inhalation of acetone fumes, especially in poorly ventilated areas.
By gathering these essential tools and protective gear, you’ll be well-prepared for a safe and efficient polygel nail removal process. Remember to follow the best practices and instructions for each tool to ensure a damage-free removal experience for your nails.
Effective Removal Techniques
Filing Method
One of the simplest techniques for removing polygel nails is the filing method. Begin by gently buffing the surface of the nails to remove the shiny topcoat. You can use a nail file for this process. Be careful not to file too deeply, as you might end up damaging your natural nails.
Once the topcoat has been removed, gradually file down the polygel layer until you reach the natural nail. Take extra caution when filing near the nail plate to avoid accidentally filing the natural nail. Remember to maintain a light touch, as excessive force can lead to damage.
Soaking Method
Another effective technique for removing polygel nails is the soaking method. First, remove the shiny topcoat by gently buffing the surface of the nails. Then, soak your nails in pure 100% acetone for 15 minutes until the polygel softens up. If you are concerned about the harshness of acetone, you can use a nail polish remover that contains acetone, which is still effective but less potent than pure acetone.
After soaking, use an orangewood stick or a cuticle pusher to gently scrape off the softened polygel. Repeat the soaking and scraping process if needed until all the polygel has been removed. Keep in mind that patience and care are essential during this process to ensure the health of your natural nails.
Once the polygel has been removed, it is crucial to rehydrate the nail plate and surrounding skin. Applying lotion and cuticle oil will help prevent dryness and restore the hydration balance. Such aftercare will assist your nails and cuticles in recovering from the removal process, ultimately ensuring the wellbeing of your natural nails.
Aftercare and Maintenance
Nail Recovery
After successfully removing your polygel nails, it’s essential to focus on nail recovery. Start by gently buffing the surface of your natural nails to smooth out any irregularities. Apply a high-quality nail strengthener or nail treatment on your nails to help them regain their natural strength and shine. Additionally, don’t forget to regularly moisturise your hands and nails with a nourishing hand cream, focusing especially on the cuticles.
Incorporate the following habits into your daily routine to aid nail recovery:
- Apply cuticle oil at least once a day
- Limit contact with harsh chemicals and detergents by wearing gloves during household chores
- Avoid using nails as tools (e.g. for opening cans)
- Maintain a balanced diet, rich in vitamins and minerals
Preventive Measures
Taking preventive measures will help maintain the health of your natural nails if you wish to continue using polygel nails in the future. Here are some tips to protect your nails when using polygel:
- Choose quality polygel products: Always opt for high-quality, reputable brands that are gentle on the nails. Consider investing in a professional nail technician’s services for polygel application and removal.
- Let your nails rest: Avoid using polygel nails continuously. Give your natural nails a break for a couple of weeks between applications to allow them to breathe and recover.
- Practice proper application and removal: Follow the recommended guidelines for polygel application and removal. Avoid shortcuts that may lead to nail damage.
- Maintain good nail hygiene: Keep your nails clean and dry, and avoid biting your nails or cuticles. Use a gentle nail brush to clean underneath the nails and minimise the risk of infections.
By adhering to these aftercare and preventive measures, you can ensure your nails remain healthy and strong while enjoying the versatility and durability of polygel nails.
Frequently Asked Questions
When to Consult a Professional
While it is possible to remove polygel nails at home by following proper instructions, there are certain situations where you should consult a professional. If you have weak or damaged nails, it’s advisable to seek help from a professional to prevent further damage.
Additionally, seek professional help if you experience severe pain or irritation during the removal process. Remember that a professional nail technician has the expertise and tools necessary to safely remove polygel nails without causing harm to your natural nails.
DIY vs. Professional Removal
DIY Removal:
- Cost-effective: Removing polygel nails at home can save you money compared to going to a nail salon.
- Convenience: You can remove your polygel nails at your own pace and comfort.
- Risks: Incorrect removal techniques can damage your nails or cause discomfort. Make sure to follow expert advice like soaking your nails in pure 100% acetone and being gentle when scraping off the excess gel.
Professional Removal:
- Expertise: Professional nail technicians have the experience and skills to remove polygel nails safely and efficiently.
- Quality tools: A salon will have specialised tools, such as e-files and gentle nail buffers, to prevent damage to your natural nails.
- Time: A professional may be able to remove your polygel nails more quickly than if you attempted it yourself.
When deciding between DIY and professional removal, consider your personal comfort level, the health of your natural nails, and your experience with nail care. While at-home removal can be cost-effective and convenient, it may not be suitable for everyone.
If you’re new to polygel nails or have concerns about damaging your nails, consulting a professional is a wise choice.
Conclusion
Removing polygel nails can be a simple process if you follow the proper steps. Begin by shortening your nails with a nail clipper and gently filing off the top layer of the polygel. This will make the removal process more manageable and reduce the risk of damaging your natural nails.
Next, soak cotton balls in acetone and wrap them around the nails using nail clips or foil. Let them sit for 10 to 15 minutes to effectively break down the polygel. Once the time is up, use a cuticle pusher or orangewood stick to gently scrape off the softened polygel.
Remember to be patient during this process, as rushing can cause damage to your natural nails.
Finally, after all the polygel has been removed, shape your nails and apply cuticle oil and hand cream to soothe and nourish the skin. This will help maintain the health and appearance of your nails in the long run.
By following these steps, you can confidently and safely remove polygel nails without causing damage to your natural nails. Remember to use good quality acetone and take your time throughout the process for the best results. With practice, removing polygel nails will become an easy and efficient routine for maintaining your stunning nail look.

I’m Jennifer a beauty and wellness expert. I believe in promoting a sustainable and healthy lifestyle from within. Helping people feel good is my passion; whether it’s teaching yoga or offering skincare advice.