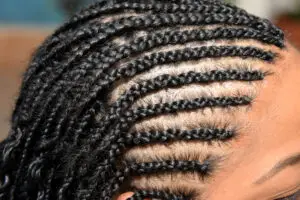
Invisible part weaves give you away to let people see your scalp but not allowing individual hair strands too stand out too much. The part may be visible, but the fact that you used a weave or hair extensions to create a part is not visible.
This can be a kind of deceptive term, calling it an invisible part when really the part is easy to see. If you put in an invisible part properly, the tracks and wefts won’t be visible. It looks then like the hair extensions you put in are coming from your scalp directly.
So, with this technique, you can use artificial hair and artificial lengthening methods and make it look natural. You’ve probably seen people with invisible parts and didn’t even realize they were using hair extensions or weaves.
You may want to try asking a professional for help the first time this is done and watch closely how they do it. It can be tricky to pull it off right, and you may be disappointed with the results the first time you try.
It can be a little trickier if your hair is curly, as straight hair is usually easier to part. People who try to do an invisible part with curly hair or do it themselves without getting any help the first time don’t always look very good.
I’ve seen some really awful ones in my time that have caused me to recommend people get help the first time they try it.
If you’re going to do an invisible part with curly hair for your weave, make sure you use the sew-in method or the glue-in one.
What is an Invisible Part
Invisible parts are done with weaves, and they give you a a weave part that looks really natural. They can fool people into thinking that the hair is growing straight from your scalp and that there’s no weave involved. It’s really cool once you can pull it off.
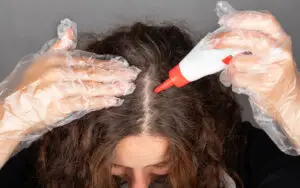
You have some freedom to try different hairstyles and mess with the colors, so if you want to try dyeing your hair a different color and not expose the uncolored roots, try this method. You can dye your hair more effectively, covering up the roots, and giving yourself a more natural look. You’ll want to get the invisible part just right, though, as people would be able to tell it’s not natural if you mess it up.
Making an Invisible Part Weave
You can give yourself a whole new hairstyle with this part, and you can use the quick sew-in weave method or glue-in method to do it.
If you’re going to do the sew-in method, leave the glue out and use a stocking cap. You’ll also need some gel to help mold your hair so that you have a flattened base to work from. If you want, you can use glued hair and put that on the inside of the stocking cap, sticking it there, before you place it on your head.
You may want to try this out on a mannequin head to see if you can get it to look right before you try it out on your own or on a friend’s head.
You’ll need scissors, comb and brush, glue, weave tracks, and a stocking cap.
Step 1:
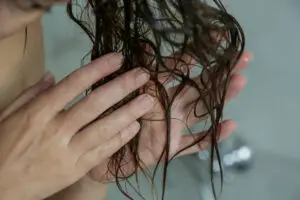
Start by combing your hair out to untangle it and remove any knots that might be there.
Then, wash your hair thoroughly with shampoo and conditioner. Clean hair works best for this process. If the weave is staying in your hair for a few weeks, washing it is very important.
Step 2:
Then, spread holding gel through the hair, ensuring that it gets throughout the entire hair, even the ends.
From there, figure out where you want to make the part. It doesn’t have to be in the middle. Use the comb to make a part and then wrap it with gel. Push the hair down flat onto your scalp, making sure that nothing is sticking up.
Then, go through your entire hair and mold it so that it holds in place smoothly.
Step 3:
Now it’s time to dry your hair. You can use a hair dryer to get the excess moisture out of the gel. Drying it is important, as it keeps the tracks from getting through your stocking cap.
Step 4:
When your hair is fully dry, you can put on the stocking cap. Place the cap to create a shape for the back of your head, not to keep the part down.
You can fix the tracks in place at that point, applying bonding glue into your stocking cap. You don’t want to use a lot of glue, and a thin layer will be enough. Once the glue is in, you can put the end of the tracks in, working on the nape or back of your head to start with. Once the tracks are in, you want to press them down so that they stick.
Do this with all of the tracks, making sure you put pressure on them to keep them stuck in. Don’t cover the parting with the tracks at all, as you wanted to be visible.
Step 5:
Finally, you’ll be making the part. You can cut down some of the track from the row closest to the part and stick that in at the crown but make sure that the angle doesn’t put it in your face. Then, glue in the rest of the tracks or sew them in, depending on the method you’re using.
To create the closure, put some glue on a small stretch of track and then attach it to the stocking cap.
This should create a rolled piece that you can guide to make the closure part. From there, you can style it how you want.
And that is how to do an invisible part with curly hair.

I’m Jennifer a beauty and wellness expert. I believe in promoting a sustainable and healthy lifestyle from within. Helping people feel good is my passion; whether it’s teaching yoga or offering skincare advice.